None of us know if or when a crisis will strike, but being prepared is always a smart idea especially if you are on your own. Whether you are an expat overseas in Canada like me or you’re a traveler gearing up for your next big trip, it’s important to have an emergency kit at the ready just in case. Read on to learn how to make an emergency kit on a budget.
Importance of Emergency Preparedness for Solo Travelers
As solo travelers, we love exploring places on our own, which means that anything can happen at any time. One of the ways we can handle the unexpected challenges of traveling alone is by being familiar with emergency preparedness.
Staying safe is always top of mind while we have adventures, and having an emergency kit is just a smart thing to have.
Reasons why I think it’s worth making an emergency kit when you are on your own:
- You have to rely solely on yourself in unexpected situations. Having an emergency plan could make a significant difference.
- From natural disasters to health issues, emergencies can happen anywhere,
- Knowing you are prepared for emergencies will reduce the potential anxiety and stress of traveling alone.
- In case of accidents or health emergencies, knowing what to do and having essential items like a first aid kit can mean the difference between a manageable situation and a crisis.
- By keeping emergency contacts handy and ensuring your devices are charged, you will always be able to contact loved ones or emergency services if you need to.
- Travel plans can change unexpectedly. Having backup options and knowing local emergency services will help you adapt.
- Some destinations may have specific requirements for travelers, such as travel insurance or emergency contact information. Compliance with these regulations is essential.
- Living in different countries can expose you to the possibility of natural disasters that you are not experienced in dealing with.
Having An Emergency Kit Is Worth The Money
In case of a natural disaster, political instability, health emergencies, or find yourself just stuck somewhere, you’ll be glad to have essential supplies with you to help you handle whatever you encounter.
When I first moved to Vancouver in British Columbia, Canada, the last thing on my mind was that I should have an emergency kit. In Vancouver, emergency preparedness is prioritized because there’s a risk of earthquakes, but it took me years to make an emergency kit.
Now it gives me so much peace of mind to know that I have supplies if an emergency arises so it’s well worth the investment.
Remember, being prepared doesn’t mean expecting the worst; it means being ready for the unexpected. Always research your destination, stay informed about local conditions, and have a plan in place. It’s all part of ensuring that your solo travel experiences are as safe and enjoyable as possible.
Disasters You Should Be Prepared For At Home And Abroad
We will all face some sort of disaster or scenario that can leave us without power or water or access to buy food at some time in our lives. It could be a natural disaster like a hurricane, snowstorm, flood, tornado, or earthquake. Or it could be a manmade disaster that has the power grid failing or requires you to stay put in your home for a few days or even weeks.
The first step to getting prepared for any crisis is to make a list of the disasters that are most likely to occur where we live as well as when we are traveling.
Natural Disasters You Could Face
Your first step in your disaster preparedness is to make a list of possible emergencies where you live. Take a few minutes to review the types of disasters your area is prone to especially natural disasters like earthquakes, hurricanes, or tornados.
Here in British Columbia, and California we live on fault lines so for me, there’s a risk of earthquakes that the local government provides information on. If you live in Florida or the South Eastern US coast, you should prepare for hurricane season.
If you live in the northeast or south of the Great Lakes, you should get ready for big snow storms. If you’re in the Mid-West or South West, chances are you’ll come across a tornado or two.
Also do this exercise when you are thinking about going somewhere on vacation, especially if it is a place where you know there is a risk of natural disasters, as it may impact dates of travel to avoid high-risk times of the year.
Man-Made Disasters You Could Face
Next, think about possible man-made disasters. If you live near a dam, you may need a plan of action for flooding. If you live near a nuclear plant, you should think about a way to get out quickly if something were to happen at the plant. You get the idea. What disasters we prepare for will be different for a lot of us and what sort of emergency plan you have will depend on those variables.
Read on to learn how to make an emergency kit for all of your adventures.

Start With An Emergency Plan For Your Solo Adventures
Sooner or later you will encounter an emergency event that requires you to jump into action to stay safe and sound especially if you travel a lot. Any crisis will be a lot easier to handle if you are prepared for anything and know exactly what to do. So the first step to making an emergency kit is just having a plan for emergencies whether you’re at home or abroad.
How To Create An Emergency Plan
The first thing to do to create an emergency plan is just to ask yourself “What things would I need in an emergency?”. This will help you to start figuring out what steps are necessary for your particular situation, and situations you could find yourself in.
The next step in preparing a plan will be to start making a list of what equipment or supplies you would need for different crisis events.
To make this a little easier, here are the three most basic questions that you should ask yourself to formulate an emergency preparedness plan.
Emergency Plan Q1: Where Will You Go?
The first question you need to ask yourself is where you will go if or when an emergency arises. With this question, you also need to consider where you’d go if you were on vacation. So you’ll need to think about what would make the most sense to you in either scenario.
These decisions may be outside of your control sometimes, such as in the event of a mandatory evacuation, but there will also be plenty of times when the decision is up to you.
For example, if you’re at home or living abroad at the time, will you stay at home and shelter in place? If you can stay put, you can take care of issues as they pop up and prevent further damage. If a storm blows out a window, you can board it up and prevent water from coming in for example.
At other times, it may be safer and more convenient to get out of the disaster’s way. So for those cases, as well as mandatory evacuations, you’ll need to think about where you would go. Do you have family or friends you can stay with? If that’s not an option, look into an area you may want to travel to and get the numbers of a few hotels.
Research & Plan For Different Emergency Situations
Things move fast when a storm hits and evacuations are ordered. so you don’t want to waste time trying to make those decisions and be unable to find a hotel room. Shelters should always be a last resort as it’s not the most comfortable place to make it through a disaster.
Likewise, if you are on vacation or just travelling around would you stay in your accommodation, or are you aware of any other locations you would need to go such as where the safety zone is or a meeting place is in case of a serious weather warning?
These are important questions and you don’t want to have to make those decisions when you are in the middle of a disaster if you can avoid it. It will be stressful in the moment, making it harder to make smart decisions quickly.
A big part of your emergency preparedness plan is basically to think through any possible scenarios and then research them to get the information you need ahead of time. For example, figure out what routes you can take to get out of an area, determine where you want to go if possible, and then get the contact information for a hotel or the people you’ll be staying with.
Emergency Plan Q2: How Will You Stay In Touch With People?
Is there anything scarier than not being able to get in touch with loved ones during a disaster or emergency event? Possibly not! It’s also really important that you will be able to get news, emergency alerts, or announcements. So you’ll need to consider how you’ll be able to do this regardless of whether you are on the road, at home, or at an emergency shelter.
For example, making sure that everyone has a mobile phone will be a good start, as well as making sure that these devices are charged. So having phones, and chargers including car chargers with you is a must-have. Also, an additional battery or some kind of backup power supply will be handy as well.
You’ll also need to be conservative with your device usage to make the battery power last as long as possible. So part of your plan, if you are traveling with kids or friends, will probably be to speak to everyone in your group ahead of a disaster and remind them of this regularly.
Don’t rely on just your smartphone for news and communication. A backup plan will come in handy when you can’t get a good connection or run out of power on your device. Designate a meeting point or a person that everyone contacts when you can’t get a hold of each other. Have a backup solution for finding out what’s going on like a weather radio.
Emergency Plan Q3: What Supplies Would You Need?
The more prepared you are for any situation whether at home or abroad, the safer and more comfortable you’ll be when the inevitable happens. The supplies you will need will depend on things like what natural disaster you face, where you are at the time, the weather, and who you are with at the time.
But there are basics that you will need for survival no matter where you are like food, water, shelter, and first aid supplies (medications, etc.) so that’s a good place to start when making a list. Then think about the basics for any pets that you have.
Include Some Treats & Home Comforts In Your Supplies
Once you have some basics listed out, you can move on to some creature comforts like blankets, light, and entertainment. For example, having a headlamp and a book to read could make a power outage a lot more pleasant. Maybe a hot chocolate made with a camping stove, hot water, and instant cocoa mix will make things even more pleasant.
Be prepared with supplies for different scenarios and you will have a far better chance of making it through the emergency or disaster just fine. That’s why creating your emergency preparedness kit is a smart thing to do even if you don’t think you’d ever be at risk of a disaster.

How To Make An Emergency Kit Yourself
Your answers to the last question of your emergency preparedness plan are the foundation for your emergency kit. Having all your supplies together in one place will make sure that you have everything you need if disaster strikes.
For instance here in Vancouver, we are always at risk of earthquakes so we are all encouraged to have a basic emergency kit.
Basic Emergency Kit List
The general guidelines for your emergency kit are to store enough food, water, and equipment to last for about three days per person.
This basic list below is for a stay-in-place survival kit to keep in a box, backpack, or earthquake bag.
- Three days’ water supply for each member of your family (at least 1 gallon per person, per day)
- Three days’ supply of non-perishable food, plus a can opener
- Water purification tablets
- Cash and small bills are best
- Prescription medications
- Copies of your personal documents
- Flashlights in every room with extra batteries
- Power packs for phones
- Whistle
- Swiss Army knife
- Duct tape
- Work gloves
- Matches in a waterproof container
- Knife, pliers, and scissors
- Local maps (paper)
- Dust mask
- A water-resistant or waterproof tarp for shelter
- Sleeping bag and blankets
- Toilet paper and tissues
Emergency Water Supply
For your water supply, you are assuming that you will continue to have running water, but you should consider scenarios where you wouldn’t have running water just in case.
This is your number 1 priority for your emergency kit because you can make it much longer without food than without water.
Buy water bottles, or fill up milk jugs, soda bottles, and the like to ensure you have enough clean water to safely drink for a few days.
Purchase bottled water for an emergency kit. Keep it in its original container in a cool and dark place that’s easy to reach.
Additional things to remember:
- Don’t open any of your water until you need it
- Don’t use water that’s past its expiry or “best before” date
- Don’t use water from toilet tanks or bowls, radiators, waterbeds, swimming pools, or spas
How To Determine How Much Water You Would Probably Need
As a general rule, adults would need to consume about 4 liters of water a day. This quantity increases for children, sickness, and people who are nursing. If temperatures are high, you may need as much as double your usual water intake.
Pets also need a certain amount of water every day. You can estimate around about 30 mL of water per kg of body weight per day for your pets.
Survival Food Storage In Case Of Emergency Or A Disaster
When you are sheltering in place, are planning on staying in a shelter, or even dealing with the possibility of being stuck out on the road, having food and water is your top priority in any disaster situation. You can make it without power, and a lot of creature comforts, but you can’t survive without food and water.
Emergency food storage doesn’t have to be complicated or expensive. It can be mainly comprised of items your family is already eating. Before you go out and start buying all the water, bread, and milk you can get your hands on, figure out how long you want to prepare for. Having at least a week’s worth of food and water stored up can be a great idea during a natural disaster. Keep in mind that you not only have to ride out the storm itself but that it may also take extra time before help and supplies can make it to you.
Non-Perishable Foods For Your Emergency Kit
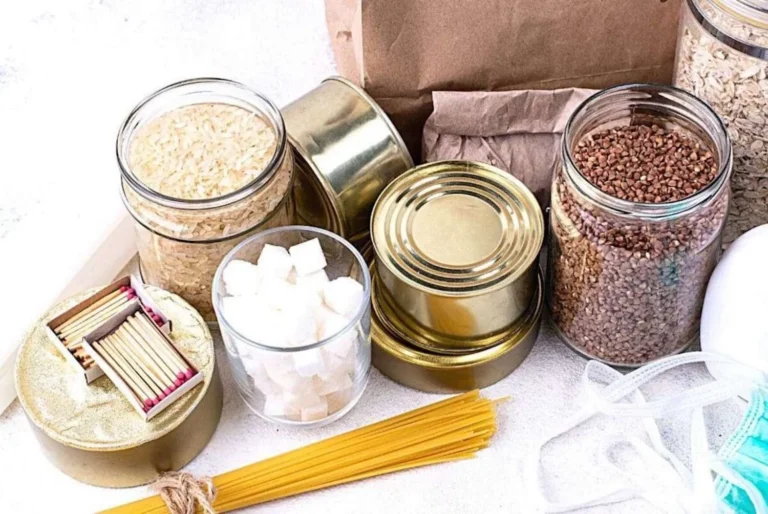
Next, think about the non-perishable food that your family will eat. Choose food that you can eat as is. Crackers and peanut butter are a good choice, as are canned beans, soups, and the like. Canned tuna or chicken makes for a great protein source. Bread is another good option along with your favorite non-perishable sandwich toppings. Don’t forget about things like granola bars, protein bars, nuts, or beef jerky that you can eat right from the package.
If you have a camping stove or a grill outside, you may also be able to heat and cook some foods. Instant oatmeal, coffee, hot chocolate mix, soups, and even instant rice are great options if you can heat water when the power goes out.
Stock Up On Treats
Last but not least, stock up on some favorite treats like chocolate, chips, pretzels, cookies, and the like. It will make getting through those tough disaster days a little more bearable.
Start with a list of things that you know your family will eat and things you’ll use up even when you don’t need them during a disaster. From there, start to round it out with things that will keep you full and healthy, and pick those up as needed. For example, you may eat canned vegetable or chicken noodle soup regularly but aren’t a big fan of tuna. Keep a small supply of the soups in your pantry at all times (rotating through them as needed), and pick up a few cans of tuna as needed.
Talk to your family about your survival food supply and let them have input into what you should stock and keep as well. It will give them a sense of control and responsibility and of course, ensure that everyone is happy with the meals available when things get serious.

How To Make An Emergency Kit For Your Pet/s
If you have furry family members, you will also need to make an emergency kit for your pets too. For a basic kit, you need to pull together:
- Sturdy leashes and harnesses
- Carriers for transport
- At least three days’ supply of food and water
- Cat litter/pan, scooper and trash bag
- Doggie disposal bags and disposable gloves
- Bowls for food and water
- Treats and toys
- Blankets
- Medications and copies of medical records
- Current photos of you with your pets/s in case they get lost
- Information on feeding schedules, medical conditions, behavior problems, and contact information of your vet in case pets have to be fostered/boarded
- I also bought a basic first-aid kit for Lily
Basic Emergency First Aid Kit For Your Pet/s
- Bandages
- Scissors
- Sterile saline eyewash
- Medications
- Disinfectants: soap, anti-septic spray, hydrogen peroxide, antibiotic lotion (rinse and flush your pet thoroughly with water afterward)
- Thermometer
- “Instant” ice packs and heating pads
- Tweezers
- Non-stick bandages (gauze, pads, bandage rolls, cotton balls)
- Antibiotic wipes or ointments
- Splint materials: tongue depressor, 12-inch wooden ruler or thick magazine, etc
- Milk of magnesia and activated charcoal: absorb ingested poison.
*Just check with your vet on specifics on what items are best for your fur baby.
Make sure your pets are microchipped and outfitted with current ID tags. Also, have a list of which friends, relatives, boarding facilities, animal shelters, or vets could take care of your animals in an emergency with their contact names and numbers in your kit
How To Make An Emergency Binder For Your Kit
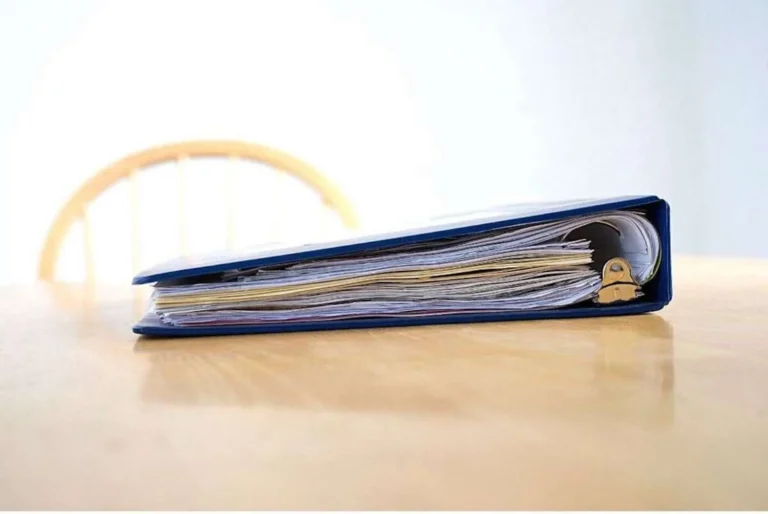
There are so many scenarios besides a natural disaster where you could need an emergency binder of all your important information and documentation.
For instance, not to be pessimistic, but what if your house caught on fire, got flooded, or was broken into? Or what if you have a sudden medical emergency or an accident? Or will suddenly be away from home for a while.
Emergency Binder Section 1: Personal Documents
Your first section is essentially anything that you would think of as personal documents, and this will vary depending on things like what country you live in and your material status, but these are a few things you should consider including:
- Birth Certificates
- Social Security Cards/ SIN
- Passport
- Drivers Licence
- Licenses (Marriage License, Drivers License, etc.)
- Emergency Contacts & Personal Contacts Lists
- Current Photos of every member of the family and any pets
- Insurance Policies (Life insurance etc.)
- Will & Trust
- Emergency Plan (if you have one)
Emergency Binder Section 2: Medical Information
This section will vary based on family and medical issues, and where you live in the world.
- Health Services Card
- Immunization Records
- Insurance Cards/ Policies
- Medical Documents
- Prescriptions
Emergency Binder Section 3: Financial Information
- Cash
- Banking Information (checking and savings account numbers, bank contact numbers, etc.)
- Credit Cards (Make a copy of the front and back of your credit cards)
- Tax Documents
Emergency Binder Section 4: Home & Auto Information
- Home Insurance Policy (policy numbers and contact information)
- Home Inventory (a basic list of all your items in your house – things like technology, jewelry, and sentimental items. Include details like brand, model, serial numbers, description, when and where you bought it, and warranty info. Also, include pictures of your belongings)
- Deed
- Auto Insurance Policy (Policy numbers and contact information for all vehicles that you own, your policy, and any insurance cards that you have)
- Vehicle Titles (Will give you quick access to VIN numbers and other information that police or other emergency services may need)
- Extra Keys (for vehicles, houses, other buildings, post office boxes, safety deposit boxes, etc.)
- Irreplaceable Documents (Put things like important documents, photos, and videos on a flash drive)
Emergency Binder Section 5: Pet Information
If you have any pets, these are things you should include:
- Current Photos of your pet/s
- Pet passport (yep my cat has a passport)
- Proof of Ownership
- Pet Insurance
- Medical Records
You may also want to include things like key business information if you have a business, details of logins and passwords (although not recommended in a binder), and anything else that you think is important.
Ultimately what you include, and how you put your binder together is down to your circumstances, and what you feel is important, but I hope that this is a helpful starting point for you.
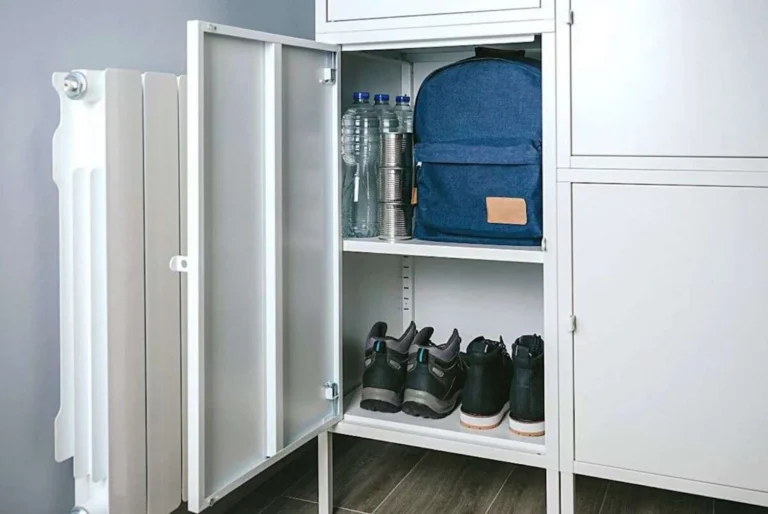
Keep Your Emergency Kit In An Easy To Carry Container
When it comes to emergency kits, and the container you choose to use to store everything in, one size doesn’t fit all. But there are some general guidelines to follow to help you choose the right container for your kit:
- The container needs to be easy to carry and store. Something like a backpack is a good option, as it can be easily stored in your closet or under your bed.
- The container needs to be durable and water-resistant. This will ensure that your belongings are protected in case of floods or other natural disasters.
- Finally, the container needs to be clearly labeled with your contact information because this will help emergency responders locate you and your family in the event of an evacuation.
Review The Contents Of Your Emergency Kit Every Six Months
Once you’ve assembled your kit, you must regularly review its contents every six months to make sure that everything is still up-to-date, useful, and complete.
Keep Your Emergency Kit In An Easily Accessible Place
In an emergency every second counts so your emergency kit must be quick and easy to grab. Ideal places to store your kit are easily accessible such as a closet by the front door or in the trunk of your car.
Additionally, to choose the right location for your emergency kit, you also need to think about safety. For example, you don’t want your kit to be in a place in your home that could get flooded in a storm.
By keeping your emergency kit in both an easily accessible and safe place, you will be able to grab your kit and go in a matter of seconds in any crisis.
How To Make A Grab-And-Go Bag For Your Travels
A great addition to your emergency preparations is a grab-and-go bag which you can easily take with you on your travels and local traps. A grab-and-go bag is a much smaller emergency kit that you can easily take with you anywhere you go. You can also make grab-and-go bags for your home, your car, your travels, and your workplace.
Here’s a rundown of the main things to include in your grab-and-go bags:
- Cash; ideally all in small bills
- Phone charging cable and plug
- Portable phone charger and its charging cable
- Water
- Food (ready to eat)
- Small first aid kit
- Personal medications
- Flashlight
- Small radio
- Whistle or personal alarm
- Extra batteries
- An emergency blanket
- Personal toiletries
- Any personal items, such as a spare pair of glasses or some contact lenses
- Copies of important documents; ID, Passport, Insurance papers, etc
- Copy of your emergency plan
- Local map of the area, with potential meeting places highlighted.
- Seasonal clothing
- Pen and notepad
Always Be Prepared For The Unexpected
Emergencies and disasters can happen at any time, so it’s important to be prepared. Having an emergency kit, plan, binder, and grab-and-go bags may feel like overkill, but it will all help you stay safe in the event of a crisis. So I hope that this rundown on how to make an emergency kit encourages you to make your own. It will take a bit of time and effort to do, but it’s worth it to help you stay safe. Plus it will give you peace of mind that you are ready to go if a crisis strikes.
Most importantly don’t wait until you are faced with disaster to work on your emergency preparedness – get started today!
Do you have an emergency kit? Let me know in the comments.

Share Me
If you found this post helpful, share it or pin it! It’s one of the best ways to show your support. Thank you!


Gemma Lawrence is the creator of This Brits Life. Born and raised in England, she has been living in British Columbia, Canada as a permanent resident since 2016. A solo traveler for the past 9 years, she hopes to inspire and help others to enjoy solo adventures too. As someone who has always struggled with her self-confidence and mental health, she also shares tips and inspirational stories relating to self-love, self-care, and mental health.

Leave a Reply